
CI/CD, an acronym for Continuous Integration and Continuous Deployment, is a software development strategy that enables developers to integrate changes into a shared repository regularly. This practice allows teams to detect errors quickly, locate them more easily, and rectify them as early as possible.
Key Takeaways
- CI/CD Pipeline with Jenkins facilitates regular integration and deployment of software, allowing teams to detect and fix errors quickly.
- Jenkins offers a rich plugin ecosystem, customizable workflows, and extensive documentation, making it adaptable for various projects.
- To create a CI/CD pipeline, you need to install Jenkins, set it up, create a new job, configure build triggers, and add build steps.
- You can run jobs periodically, execute commands, and see results through the Jenkins dashboard.
- This tutorial serves as a basic introduction to setting up a CI/CD Pipeline with Jenkins, with potential for further customization and integration.
Here, we’ll provide a simple tutorial to create your first CI/CD Pipeline with Jenkins.
The ‘Continuous Integration’ aspect involves merging all developers’ working copies to a shared mainline several times a day. The primary aim is to prevent integration problems, hence making it easier to develop cohesive software more rapidly. On the other hand, ‘Continuous Deployment’ is a software engineering approach in which software functionalities are delivered frequently through automated deployments.
CI/CD is not just a practice but a culture in the software development realm. It fosters a collaborative and transparent culture among the development teams. The approach enables developers to work simultaneously on different features of the same app without conflicts, ensuring that the codebase is clean and deployable at any given time.

What Is Jenkins?
Jenkins is a popular open-source tool that facilitates continuous integration and continuous deployment. Jenkins is a server-based system that operates on servlet containers like Apache Tomcat. It provides a simple way to set up a CI/CD environment for almost any combination of code languages and source code repositories using pipelines.
The Jenkins pipeline provides an extensible set of tools for modeling simple-to-complex delivery pipelines “as code.” The defining characteristic of the pipeline is its explicit support for continuous delivery. Essentially, Jenkins takes your software from your version control system, applies your build tools, allows you to run automated tests such as unit tests and integration tests, and gets your software ready for deployment.
Jenkins is a self-contained, platform-agnostic tool. It can be used on Windows, macOS, and other Unix-like operating systems. It’s also highly scriptable, allowing developers to interact with Jenkins from within their scripts or automate their Jenkins system.
Benefits of Jenkins
Extensive Plugin Ecosystem
One of the most significant benefits of Jenkins is its extensive plugin ecosystem. The Jenkins community has developed hundreds of plugins, making it adaptable to a wide variety of build, test, and deployment technologies. Whether you need to integrate with Git, run an MSTest suite, or publish an Apache Maven site, there’s a good chance that Jenkins has a plugin that does exactly what you need. Please keep security of your system in mind before trying or installing an unknown or new plugin.
Customizable Workflows
Jenkins supports customizable workflows. With the Jenkins Pipeline plugin, you can describe your entire CI/CD pipeline in code. This “Pipeline as Code” approach allows you to version control your delivery pipeline, making your CI/CD process replicable and more robust.
Rich Documentation and Resources
Jenkins comes with rich documentation and resources. Whether you’re a beginner or an advanced Jenkins user, the Jenkins community has produced a wealth of documentation, tutorials, and resources to help you get started and to solve any issues you might encounter.
Parallel Execution
Another benefit that Jenkins offers is parallel execution. Jenkins allows you to run multiple jobs concurrently, thereby speeding up the build and delivery process. This is particularly useful if you have a large, complex codebase or if you’re working with a distributed team.
CI/CD Tutorial: Create Your First CI/CD Pipeline with Jenkins
Install Jenkins
For Ubuntu, start by opening your terminal and updating your system’s package list with the following command:
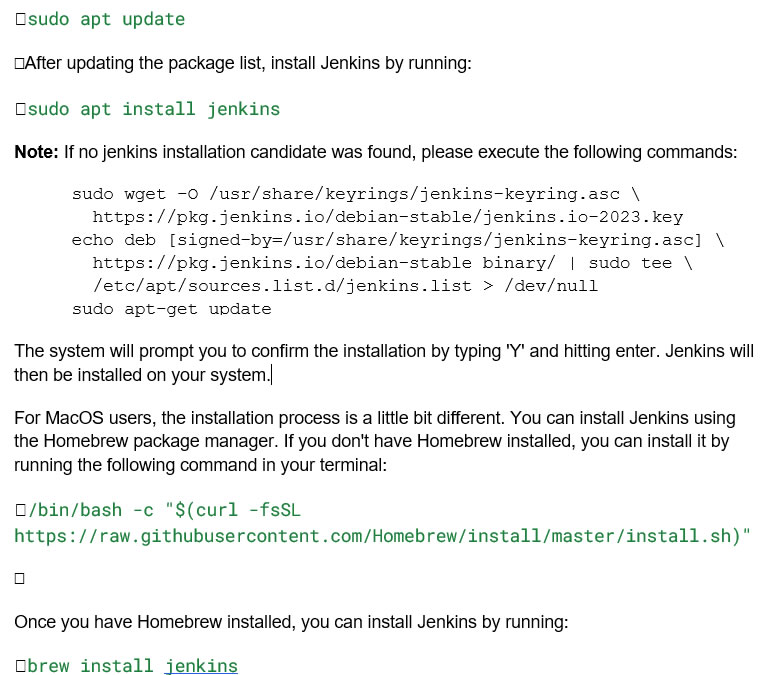
Set Up Jenkins
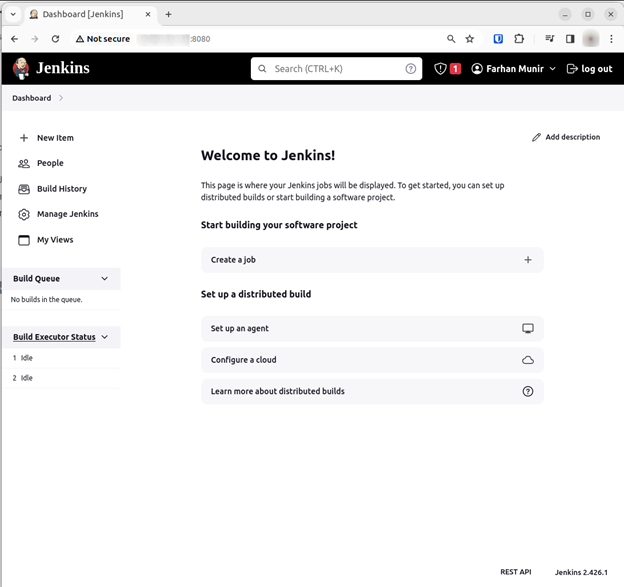
After installing Jenkins, the next step is to set it up. Open your browser and navigate to http://localhost:8080. You should see the Jenkins dashboard. The setup wizard will guide you through the initial configuration.
The first thing you’ll see is the ‘Unlock Jenkins’ screen. Jenkins generates an initial password that you’ll need to unlock it. You’ll find this password in a file in your home directory. You can display the password in your terminal by running:
“sudo cat /var/lib/jenkins/secrets/initialAdminPassword”
Copy the password and paste it into the ‘Administrator password’ field on the ‘Unlock Jenkins’ screen, then click ‘Continue’. On the next screen, you’ll be asked to customize Jenkins by installing suggested plugins or selecting specific plugins. For this tutorial, choose the ‘Install suggested plugins’ option.
Create a New Jenkins Job
Now that Jenkins is set up, it’s time to create a new Jenkins job. A Jenkins job is a series of operations that Jenkins will execute. These operations can include building a software project, running tests, deploying code, and more.
To create a new job, navigate to the Jenkins dashboard and click on ‘New Item’ at the top left. You’ll be prompted to enter a name for your job and choose the type of job to create. For this tutorial, enter ‘My First Job’ as the name and choose ‘Freestyle project’, then click ‘OK’ to create the job.
Configure the Build Trigger
The next step is to configure the build trigger. The build trigger defines when Jenkins should run your job. You can configure Jenkins to run your job at specific times or when certain events occur.
In your job configuration page, scroll down to the ‘Build Triggers’ section. For this tutorial, we’ll configure Jenkins to build our job periodically. Check the ‘Build periodically’ box and enter ‘H * * * *’ in the ‘Schedule’ field. This configuration tells Jenkins to run the job every hour.
Add Build Steps
After configuring the build trigger, it’s time to add build steps. Build steps are the tasks that Jenkins will execute when it runs your job.
In your job configuration page, scroll down to the ‘Build’ section and click on ‘Add build step’. You’ll see a list of build step types you can add. For this tutorial, choose ‘Execute shell’ and enter the following command in the ‘Command’ field:
“echo “Hello, World!””
This command simply prints the string “Hello, World!” to the console. It’s a simple example, but in real-world projects, your build steps could involve compiling code, running tests, deploying code, and more.
Save and Run the Job
Finally, after adding the build steps, click ‘Save’ at the bottom of the page to save your job configuration. You’ll be redirected to your job’s main page.
To run your job, click ‘Build Now’ on the left. Jenkins will run your job and display the result in the ‘Build History’ section. If everything is set up correctly, you should see a blue or green ball indicating a successful build.
Congratulations! You’ve just created your first CI/CD pipeline with Jenkins.
This tutorial was just a basic introduction to Jenkins and CI/CD pipelines. There’s a lot more you can do with Jenkins, like setting up pipelines for multi-branch projects, integrating with other tools, and customizing your build steps with scripts.


