

A static character portrait gets a scroll-past. The same character blinking, breathing, and turning their head slightly toward the camera gets a pause, a replay, and a share. That difference is why so many manga artists, webtoon creators, and VTuber designers have started experimenting with AI image-to-video — a way to add motion to existing artwork without touching traditional animation software.
This isn’t about replacing hand-drawn animation. It’s about giving illustrators a practical bridge between a finished piece of art and short-form video content, at a moment when short-form video is where a huge share of audience attention actually lives. This guide covers how AI image-to-video works, what it can realistically do today, and how PixAI‘s implementation fits into a comic or manga creator’s existing workflow.
Key Takeaways
- AI image-to-video enhances static artwork by adding motion, making it a practical tool for illustrators.
- PixAI offers a simple way to animate images, allowing creators to bridge the gap between illustrations and short-form video content.
- Creators can use AI image-to-video for various applications like animating manga panels, character reveals, and social media promotion.
- To create animations, select a well-composed image, upload it to PixAI, and adjust motion settings for the best results.
- The technique opens monetization opportunities while increasing audience engagement across platforms.
Table of contents
- The AI Image-to-Video Revolution
- What Is AI Image-to-Video?
- PixAI’s Image-to-Video Features
- Use Case #1 — Animating Manga Panels
- Use Case #2 — Character Reveal Videos
- Use Case #3 — Animated Comic Panel Transitions
- Use Case #4 — Social Media Promotion
- Step-by-Step: Creating Your First Animated Scene
- Motion Settings in AI Image-to-Video Explained
- Choosing the Best Source Images
- Combining AI Image-to-Video with Other PixAI Features
- Real Creator Examples
- Where to Publish Animated Artwork
- Image-to-Video vs. Traditional Animation
- Monetizing Animated Artwork
- Final Thoughts
The AI Image-to-Video Revolution
Short-form video has become the dominant discovery format on nearly every major platform, and that shift has put static illustrators in an awkward position: their best work is a single frame competing against feeds full of motion. At the same time, most comic and manga artists have neither the time nor the training to produce traditional frame-by-frame animation for every piece they want to promote.
AI image-to-video sits directly in that gap. It doesn’t ask an illustrator to become an animator — it takes artwork that’s already finished and adds motion on top of it. For creators with limited animation resources, that’s a genuinely practical bridge between illustration and animated content, rather than a replacement for either discipline.
What Is AI Image-to-Video?
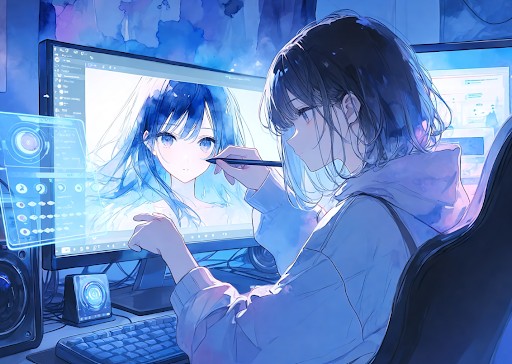
At a basic level, AI image-to-video takes a static image as input and generates motion around and within it — camera movement, subtle character movement, depth-based parallax effects — to produce a short video clip.
It’s important to be clear about what this technology actually does: it creates motion from existing artwork, using AI to interpret depth, likely movement, and camera behavior, rather than replacing traditional frame-by-frame animation. A skilled 2D animator hand-drawing a full walk cycle is doing fundamentally different work than an image-to-video tool animating a portrait’s breathing and blinking. Both have their place, but they’re not interchangeable.
PixAI’s Image-to-Video Features
PixAI’s image-to-video tools are part of its broader Video Generation Suite, available to PixAI Membership subscribers. The suite includes two complementary approaches:
• Image-to-Video (I2V), which animates a static image into a dynamic video clip up to 10 seconds long
• Text-to-Video (T2V), which generates full video sequences directly from a text prompt, supporting all of PixAI’s AI models and custom LoRAs for maximum creative flexibility
Plus and Premium members gain access to Professional Mode, which unlocks more advanced motion controls and customization for finely-tailored results. The workflow itself is designed to stay simple: upload or select a source image, apply motion settings, preview the result, and export, without requiring any animation software or timeline-based editing knowledge.
Use Case #1 — Animating Manga Panels
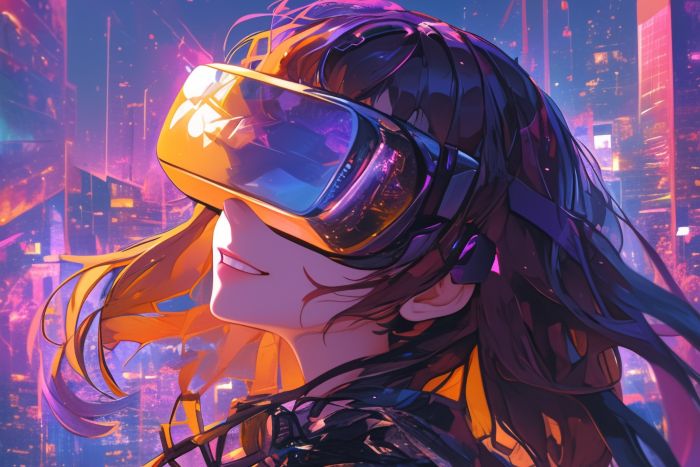
One of the most immediately useful applications of AI image-to-video is bringing an existing manga panel to life for social promotion. A typical workflow: upload a finished panel, apply subtle character movement (a shift in expression, a slight head turn), add background depth so the scene feels less flat, and optionally introduce a slow camera pan across the panel. The result exports as a short clip suitable for a social feed.
Animated manga panels tend to perform well for promotion precisely because they stand out in a feed dominated by static images — a chapter announcement built around a moving panel reads as more premium and more attention-grabbing than the same panel posted flat.
Use Case #2 — Character Reveal Videos
Character reveals are a natural fit for image-to-video, whether it’s an original character, a VTuber introduction, or a visual novel character being announced for the first time.
The most effective reveals tend to favor restraint over drama — subtle movements like breathing, blinking, a slight head tilt, or a slow camera zoom read as polished and intentional, while overly aggressive motion can look uncanny or draw attention to the artifacts of AI-generated movement. For a first character introduction, understated motion consistently outperforms exaggerated effects.
Use Case #3 — Animated Comic Panel Transitions
Beyond single-panel animation, image-to-video can enhance the reading experience of digital comics and webtoons by adding motion between panels — a transition effect that guides the reader’s eye from one scene to the next.
This works best as a storytelling enhancement layered onto sequential art, not as a replacement for the panel structure itself. Webtoon-style vertical scrolling formats in particular can benefit from subtle motion cues that make transitions between scenes feel more dynamic without changing the fundamental reading experience.
Use Case #4 — Social Media Promotion
Animated artwork has a natural home across nearly every major short-form platform: Instagram Reels, TikTok clips, YouTube Shorts, portfolio videos, and Patreon preview content. Static posts have to compete purely on composition; animated posts get the added benefit of motion catching the eye during a scroll.
For creators who’ve already built a body of static illustration, this is often the fastest way to generate new promotional content — animating existing artwork rather than producing entirely new pieces from scratch.
Step-by-Step: Creating Your First Animated Scene
1. Select a finished illustration — ideally a clean, well-composed piece with a clear subject
2. Upload it to PixAI
3. Choose image-to-video from the generation tools
4. Adjust motion settings — intensity, camera movement, and duration
5. Generate a preview to check whether the motion reads naturally before committing to a final render
6. Export the finished video in the format suited to your target platform
Running a quick preview before finalizing is worth the extra step — motion settings that look fine in a single still often reveal awkward artifacts once actually in motion, and it’s far faster to adjust settings at the preview stage than after a full-length export.
Motion Settings in AI Image-to-Video Explained
Understanding the core motion controls makes the difference between a clip that looks intentional and one that looks like a technical demo:
• Motion intensity controls how much movement is applied overall — lower settings suit subtle character animation, higher settings suit more dramatic effects
• Camera movement adds pans, zooms, or parallax depth independent of character motion
• Video duration — PixAI’s I2V supports clips up to 10 seconds, though shorter clips often work better for social platforms with tight attention spans
• Motion style and smoothness affect how natural or stylized the movement appears
• Dramatic vs. subtle movement should generally match the content — a character reveal favors subtle motion, while a promotional trailer might call for more dramatic camera work
There’s no single correct configuration; the right settings depend entirely on the source image and the intended platform.
Choosing the Best Source Images
Not every illustration animates equally well. The strongest results tend to come from high-resolution images, single-character compositions, and clean layouts without excessive visual clutter.
Common problems that hurt results include crowded scenes with multiple overlapping subjects, heavy text overlays that the AI can’t interpret as part of the scene, and low-resolution source artwork that lacks the detail needed for the AI to generate convincing depth and movement. Starting with a clean, well-lit, single-subject illustration is the most reliable way to get a usable result on the first attempt.
Combining AI Image-to-Video with Other PixAI Features
The strongest results usually come from treating image-to-video as one stage in a broader creative pipeline rather than a standalone tool: generate artwork, edit it, upscale it, then apply image-to-video, and export the finished clip.
Creators who want to build this kind of end-to-end workflow should explore PixAI’s full suite of content creation tools, since generation, editing, and animation working together as a single connected process tends to produce noticeably more polished results than treating each step in isolation.
Real Creator Examples
A manga artist promoting a new chapter might animate the cover splash page with subtle character movement and a slow camera pan, publishing the clip alongside the chapter release to drive additional engagement beyond a static thumbnail.
A webtoon creator producing teaser animations might take a key panel from an upcoming episode and animate it as a short teaser clip, building anticipation ahead of a release date. A creator wrapping up a long-running series, for instance, might animate a clean, single-character close-up of the protagonist with a slow blink, subtle hair movement, and a gentle camera zoom, then post the clip across Instagram Reels and X alongside the usual static promotional material in the days leading up to the finale — one additional piece in the launch sequence rather than a replacement for it.
A VTuber introducing a new character might use a character reveal video with breathing and blinking motion, published as the character’s formal debut across social platforms.
In each case, the animation adds engagement value on top of artwork the creator was likely producing anyway — the workflow is additive rather than requiring an entirely separate content pipeline. Actual engagement results will vary by audience, platform, and content quality, so these examples should be read as illustrative workflows rather than guaranteed outcomes.
Where to Publish Animated Artwork
Different platforms favor different formats and lengths:
• TikTok and Instagram Reels favor vertical (9:16) short clips, typically under 15–30 seconds for best engagement
• YouTube Shorts also favors vertical format with a similar short runtime
• X (Twitter) supports both vertical and horizontal video, with shorter clips generally performing better in-feed
• Patreon supports longer-form video content as exclusive supporter previews
• Webtoon platforms, where appropriate, can incorporate motion panels directly within episode content on platforms that support it
Matching your export settings to your target platform’s preferred aspect ratio and length is a small step that meaningfully affects how well a clip performs.
Image-to-Video vs. Traditional Animation
| Factor | AI Image-to-Video | Traditional Animation |
| Production speed | Minutes | Hours to weeks |
| Skill requirements | Minimal — no animation training needed | Significant — requires trained animators |
| Creative control | Moderate — guided by motion settings | Full, frame-by-frame control |
| Cost | Low — included in a subscription | High — animator time and tools |
| Flexibility | Best for short, motion-enhanced clips | Best for full narrative animation |
| Best use cases | Motion graphics, promo content, character reveals | Full productions, complex action sequences |
AI Image-to-video excels at motion graphics, promotional content, and character introductions — exactly the short, high-impact clips most comic and manga creators need for social promotion. It is not intended to replace traditional animation for full productions, complex action choreography, or narrative animated content that requires precise frame control.
Monetizing Animated Artwork
Animated content opens a few practical monetization paths worth considering: increased visibility on platforms like YouTube Shorts, exclusive animated previews as Patreon perks, promotional trailers for upcoming releases, and animated pieces as a differentiated commission offering.
These are best framed as opportunities to increase visibility and audience engagement rather than guaranteed income streams — actual monetization results depend heavily on existing audience size, platform algorithms, and content quality, none of which any tool can guarantee.
Final Thoughts
AI image-to-video gives illustrators an accessible way to add motion to artwork they’ve already created, without requiring a detour into traditional animation software or training. For manga artists, webtoon creators, and VTuber designers working with limited time and resources, it’s a practical way to extend the value of existing artwork into the short-form video formats where audiences increasingly spend their attention.
The best way to get a feel for the workflow is simply to try it on a single finished piece — pick a clean, well-composed illustration, apply subtle motion, and see how it holds up. From there, join the PixAI creator community and share your animated work, since seeing how other creators are using motion on their own artwork is often the fastest way to develop a sense for what works.