
We have all faced the dreaded “Upload Failed” notification. You spend hours perfecting a report, a digital portfolio, or a complex application form. You hit the submit button with confidence. Then a red error message stops you cold. The file is too big. Most email servers and online submission portals operate with strict limits. Suddenly, your high-quality document feels like a massive burden. I have dealt with this exact frustration while uploading documents to government portals. These sites often require files under a specific size to process applications. It is annoying and, worst of all, halts your progress instantly. You need to compress pdf to 500kb or less to get past these digital gatekeepers.
I started looking for a reliable pdf compressor 500kb solution that balances size reduction with clarity. I tested various online tools and desktop apps. I found that UPDF is the most effective way to handle this. It allows you to shrink files drastically while keeping them sharp and readable. I want to walk you through exactly why this happens and how you can fix it using UPDF on both your computer and phone.
Key Takeaways
- Uploading documents often leads to ‘Upload Failed’ errors due to file size limits, especially when you need to compress PDF to 500KB.
- UPDF is an effective tool for compressing PDFs while maintaining clarity and readability, suitable for both desktop and mobile use.
- Compression options in UPDF let you select the quality you want and preview the estimated size before saving, ensuring you meet the 500KB requirement.
- You can batch compress multiple PDFs in UPDF to save time, making it efficient for handling several files at once.
- Using UPDF helps maintain professional quality in your documents while ensuring they fit submission requirements easily.
Table of contents
Why You Need to Compress PDF to 500KB
You might wonder why 500KB is the magic number. In my experience, this specific file size is the standard threshold for a wide variety of digital interactions.
The most common scenario involves email attachments. While Gmail and Outlook usually allow up to 25MB, that space fills up fast. If you attach multiple reports or high-resolution scans, you hit the cap immediately. The real trouble starts with online forms.
I recently had to upload a scanned ID and a signed contract to a web portal for a job application. The site explicitly stated “Maximum file size: 500KB. If your PDF is 501KB, the system rejects it automatically. This is standard practice for university admission portals and government visa application sites. Legal document submission platforms and HR recruitment systems also use these caps to save server space.
Large PDFs cause other issues. They take forever to upload if your internet connection is slow. Plus, it takes them longer to download. You ensure your documents are accessible and accepted everywhere by keeping your files under 500KB.
A Step-by-Step Guide to Compress PDF to 500KB Using UPDF
I really do not like uploading my private data to random websites that might store it. I prefer using software that runs offline on my device for security. That is why I use UPDF.
UPDF is an all-in-one PDF editor. It handles everything from editing text to converting formats. Its compression tool impressed me the most. It is fast. It gives you control over the final output. Basic tools often just smash the file quality to bits. UPDF lets you choose how much quality you want to retain. It calculates the predicted file size before I hit save, so I know immediately if I have met the 500KB requirement. Plus, that one license covers my Mac, Windows, and mobile devices too
Here is how I use it to get my files down to size.
Method 1: Compressing a Single PDF on Windows/Mac
If you have a heavy document on your computer, follow these steps.
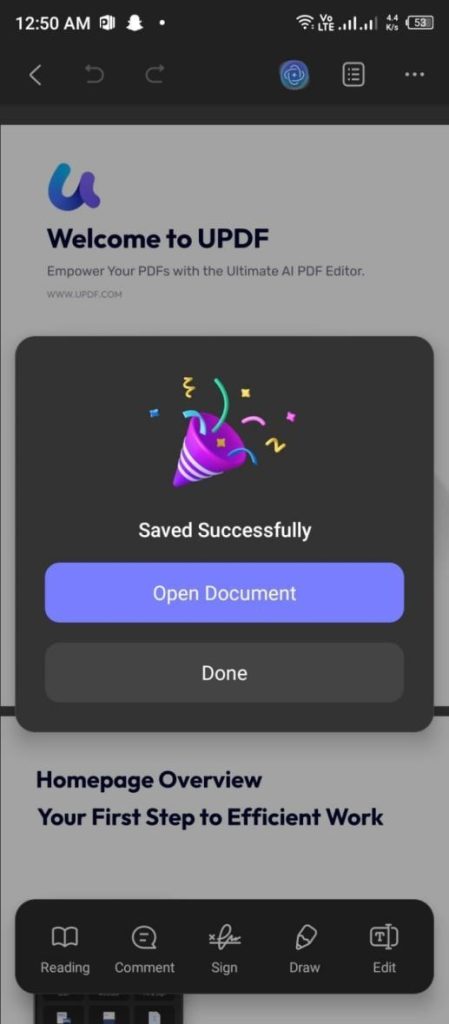
Step 1: Download and launch UPDF. Open the file you need to compress.

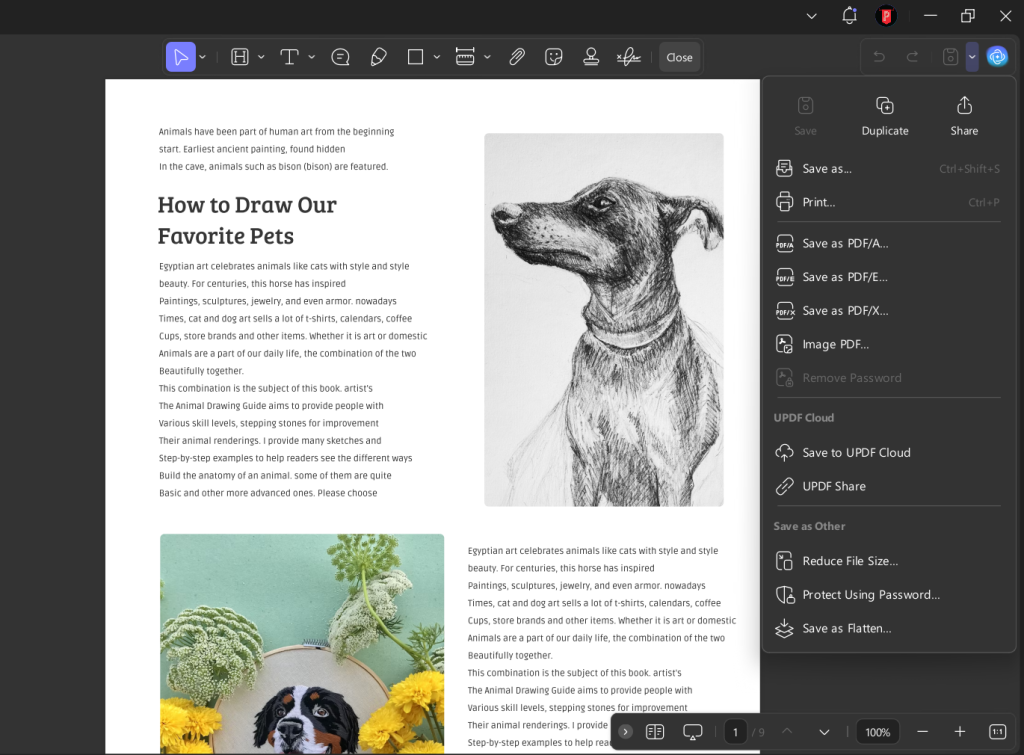
Step 2: Go to the side menu. Look for the “Save as Other” icon and then select “Reduce File Size” from the list.
Step 3: A pop-up window appears; choose any of the compression options: High, Medium, Low, or Maximum Quality.
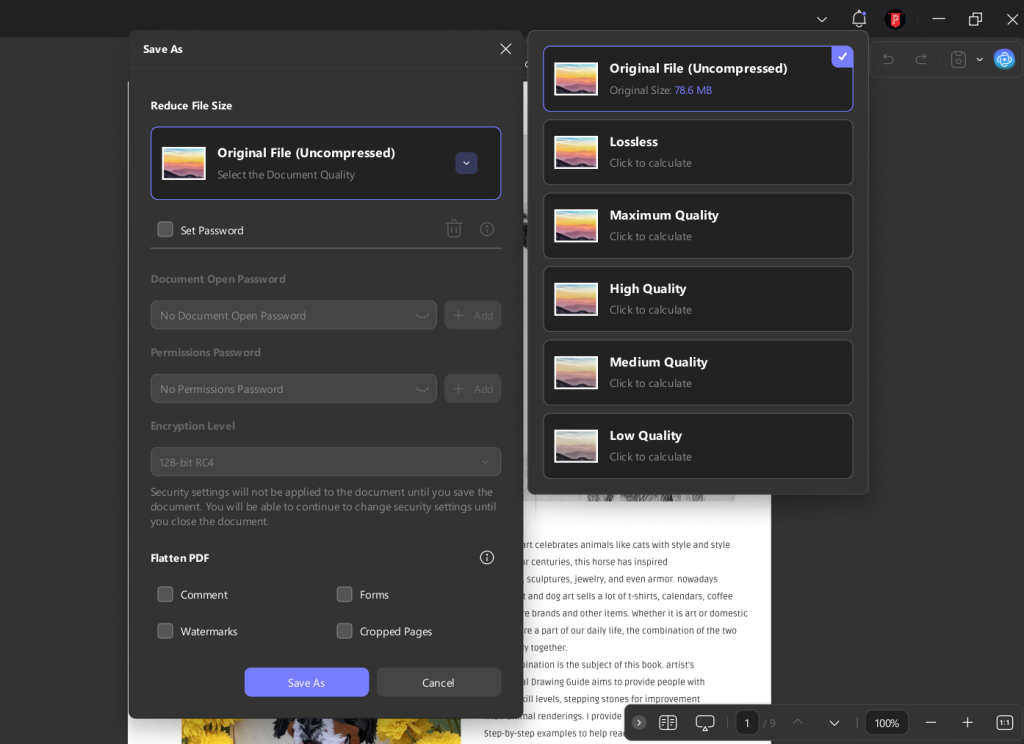
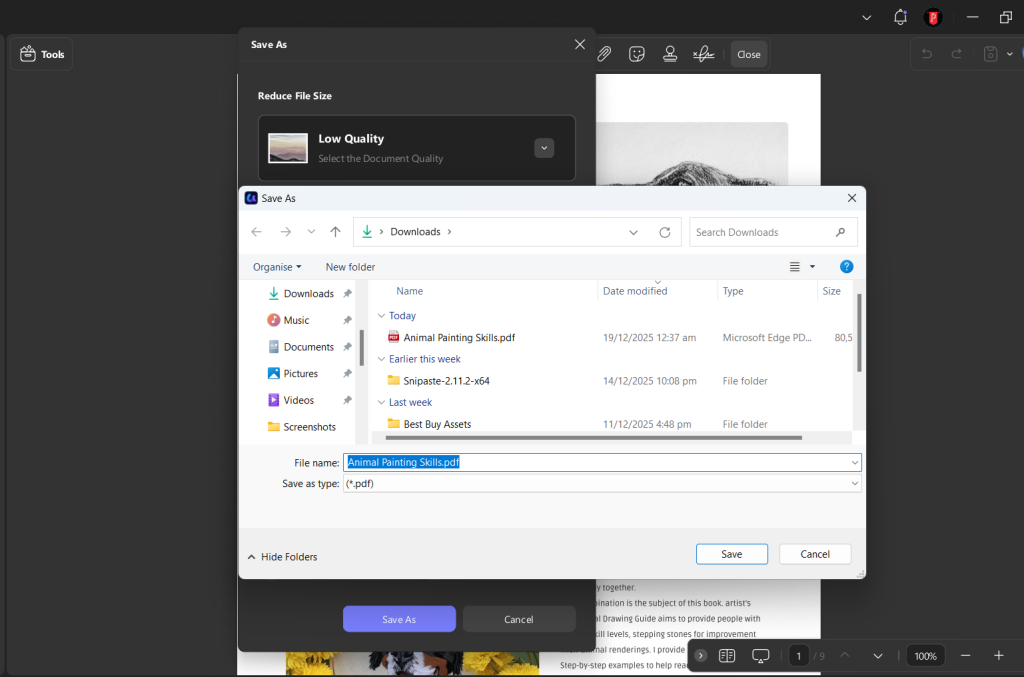
This is my favorite feature. You click on a quality setting, and UPDF automatically calculates exactly how small the file will become. The original file starts at a specific size. You select different options to see the output. You just need to select the quality tier that brings the number below 500 to compress the PDF to 500kb. Click “Save As” once you are happy with the estimated size.
Method 2: Batch Compress Multiple PDFs
I sometimes have ten different invoices that all need compression at once. Doing them one by one wastes time. UPDF has a batch feature that handles this perfectly.
Step 1: Open UPDF. On the home screen, look for the “Batch” button or “Batch Process.”
Step 2: From there, click on “Reduce File Size” from the batch menu actions.
Step 3: Upload all the files you want to process and select the quality. Wait for a little while, and you’ll be done
Method 3: Compress PDF to 500KB on Mobile (iOS/Android)
To compress files using your phone, you can use the mobile version. It works the same as the Desktop and iMac version:
Step 1: Open the UPDF app on your phone and import files from your phone’s storage, Photos, or even Cloud Drive.
Step 2: Locate the file you want to compress. Tap the “…” button.

Step 3: Tap “Compress”

Step 4: You will see options like “Flash,” “Fast,” “Normal,” and “Slow” just like on the desktop. These correspond to different compression strengths. Choose the one that gets your file size under 500KB. Tap “Reduce.”
Bonus Tip for Mobile Users:
Sending ten separate 500KB emails is annoying if you have multiple files. With UPDF, you can select multiple files and compress them into a single Zip file.
Go to your file list. Tap the checkbox icon to enter selection mode. Select the files you want. Tap “More” or the “Compress” button at the bottom menu. This creates a neat archive. It is easy to share via email or WhatsApp.
Maximizing Quality While Reducing Size
The biggest fear with compression is unreadable text. You do not want to turn a crisp document into a blurry mess. The trick is understanding the different settings UPDF offers.
Maximum Quality: This setting barely touches the images. It removes hidden metadata and redundant coding.
High/Medium Quality: This is the sweet spot for most documents. It slightly reduces the resolution of images but keeps text vector-sharp. The visual difference is usually negligible to the naked eye. This is perfect for emailing presentations.
Low Quality: This is aggressive. It significantly lowers image resolution. Use this only when you have a massive file that needs to fit into a tiny email limit. The text will remain readable. The images might look soft.
You can preview the estimated size before you commit. This saves you from the trial-and-error loop of saving, checking size, and retrying. You get it right the first time.
Conclusion
File size limits do not have to be a headache. You might be applying for a job, submitting university coursework, or even emailing a presentation. Keeping your PDF under 500KB is often a necessity.
I highly recommend giving UPDF a try. It is not just about making files smaller. It is about keeping your documents looking professional while ensuring they fit the requirements. The ability to see the estimated file size before you save is a lifesaver. The batch processing saves valuable time. Doing it all offline keeps your data safe.
Check out the UPDF User Guide if you need more help getting started. If you are tired of getting “File Too Large” errors, use UPDF to compress pdf to 500kb today. You can download it on PC, Mac, iOS, and Android to handle your documents wherever you are.


