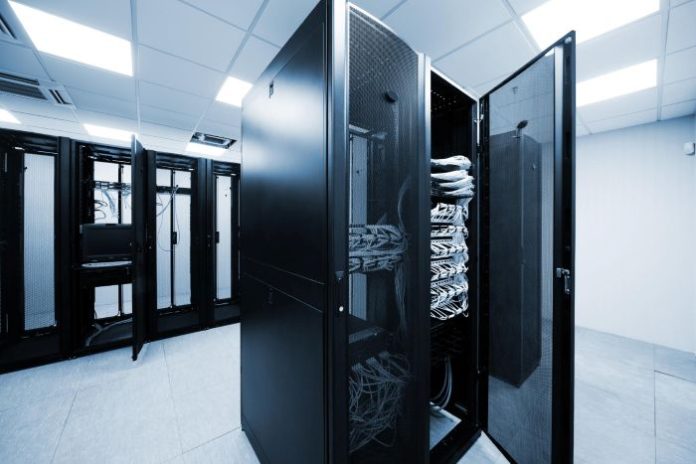
Installation of a server rack at home will be an efficient step towards organization, thermal control and security of hardware. Whether you are putting together a home server lab, a new home networking infrastructure or just want a reliable rackmount server, the best place to start is with selecting the right home server rack.
The guide is a staged process of choosing the most appropriate home server rack for your needs.
Key Takeaways
- Installing a home server rack improves organization, thermal control, and security of hardware.
- Begin with assessment and planning by evaluating your space and technical requirements for the home server rack.
- Understand different rack types: open-frame for airflow, enclosed cabinets for security, and wall-mounted racks for compact spaces.
- Consider key specifications like rack units, depth, and weight capacity for your home server rack setup.
- Choose essential features and accessories to optimize performance and ensure safe operation of your home server rack.
Table of Contents
Phase 1: Assessment and Planning
Before selecting a home server rack, evaluate your physical space and technical requirements. This step helps avoid costly mismatches and ensures smooth integration into your home environment.
Common installation locations include closets, basements, garages, and home offices. Each option has its own pros and cons. A closet setup is compact and quiet but requires strong ventilation. Basements and garages offer more room for a residential server rack, but may expose equipment to dust and humidity. If you’re placing the rack in a living area or office, acoustic control and aesthetics become important, making an enclosed cabinet the best network rack for home environments where noise and appearance matter.
Be sure to measure doorways, stairwells, and the installation footprint. Also, verify that your flooring can support the weight of a fully loaded server rack for home use. Thermal and acoustic management are critical: open-frame racks offer excellent airflow but no sound insulation, while enclosed cabinets reduce noise but require active cooling. Your choice depends on your tolerance for noise and the heat output of your equipment.
Phase 2: Technical Specifications and Home Server Rack Types
Understanding rack types and specifications ensures compatibility with your current and future gear.
There are three main types of residential network racks:
- Open-frame racks (typically four-post): ideal for airflow and accessibility, often considered the best server rack for home lab setups due to their simplicity and cost-effectiveness.
- Enclosed cabinets: provide security, noise reduction, and a clean look, often the best home network rack option for shared or visible spaces.
- Wall-mounted racks: great for compact installations and lightweight gear, though not suitable for full-depth rackmount servers for home use.
For setups requiring minimal vertical space, such as small network appliances or compact server builds, a 2U rack enclosure can be a practical and space-efficient solution. These enclosures offer the benefits of structured mounting while maintaining a low profile, making them ideal for residential environments with limited room.
Key specifications include:
- Rack units (U): 1U equals 1.75 inches. Calculate the total height of your equipment and add at least 25% for future expansion.
- Depth: measure your deepest device and add ~30 cm for cable clearance and airflow. Standard depths include 600mm, 800mm, 1000mm, and 1200mm.
- Weight capacity: total equipment weight should not exceed 80% of the rack’s static load rating to ensure safety and long-term stability.
Phase 3: Features and Integration
Accessories play a vital role in optimizing performance and maintenance. Recommended features for the best home rack server setup include:
- Casters: for mobility and rear access.
- Cable management: vertical and horizontal organizers improve airflow and simplify troubleshooting.
- Power Distribution Units (PDUs): basic models with surge protection are sufficient for most residential server rack setups; managed PDUs offer remote control and monitoring.
- Ventilation: fan panels are essential for enclosed racks to maintain safe operating temperatures.
- Blanking panels: cover unused U-space to prevent hot/cold air mixing and improve cooling efficiency.
Phase 4:Security & Noise Reduction
- Locking doors and side panels for security
- Sound-dampening racks if noise is a concern
- Useful if the rack is in a living area
Phase 5: Home Server Rack Type Options
a. Open Frame Rack
- Budget-friendly and great for airflow
- Easy access to gear
- No enclosure = more dust, less security
b. Wall-Mount Rack
- Space-saving
- Ideal for small networking setups or shallow gear
- Limited to lighter equipment
c. Enclosed Rack (Cabinet)
- Best protection (dust, noise, physical access)
- More expensive
- May have cooling fans built in
Final Selection and Setup
To complete your setup, start by listing all equipment with dimensions and weight. Based on your space and noise considerations, choose between an open-frame or enclosed cabinet. Calculate the required rack height and depth, allowing room for growth and airflow. Then select the necessary accessories to support performance, safety, and maintenance.
By following this structured approach, you’ll confidently choose the best home server rack for home use, a solution that’s scalable, efficient, and seamlessly integrated into your living space.


